Showing posts with label Free. Show all posts

Saturday, 7 May 2011

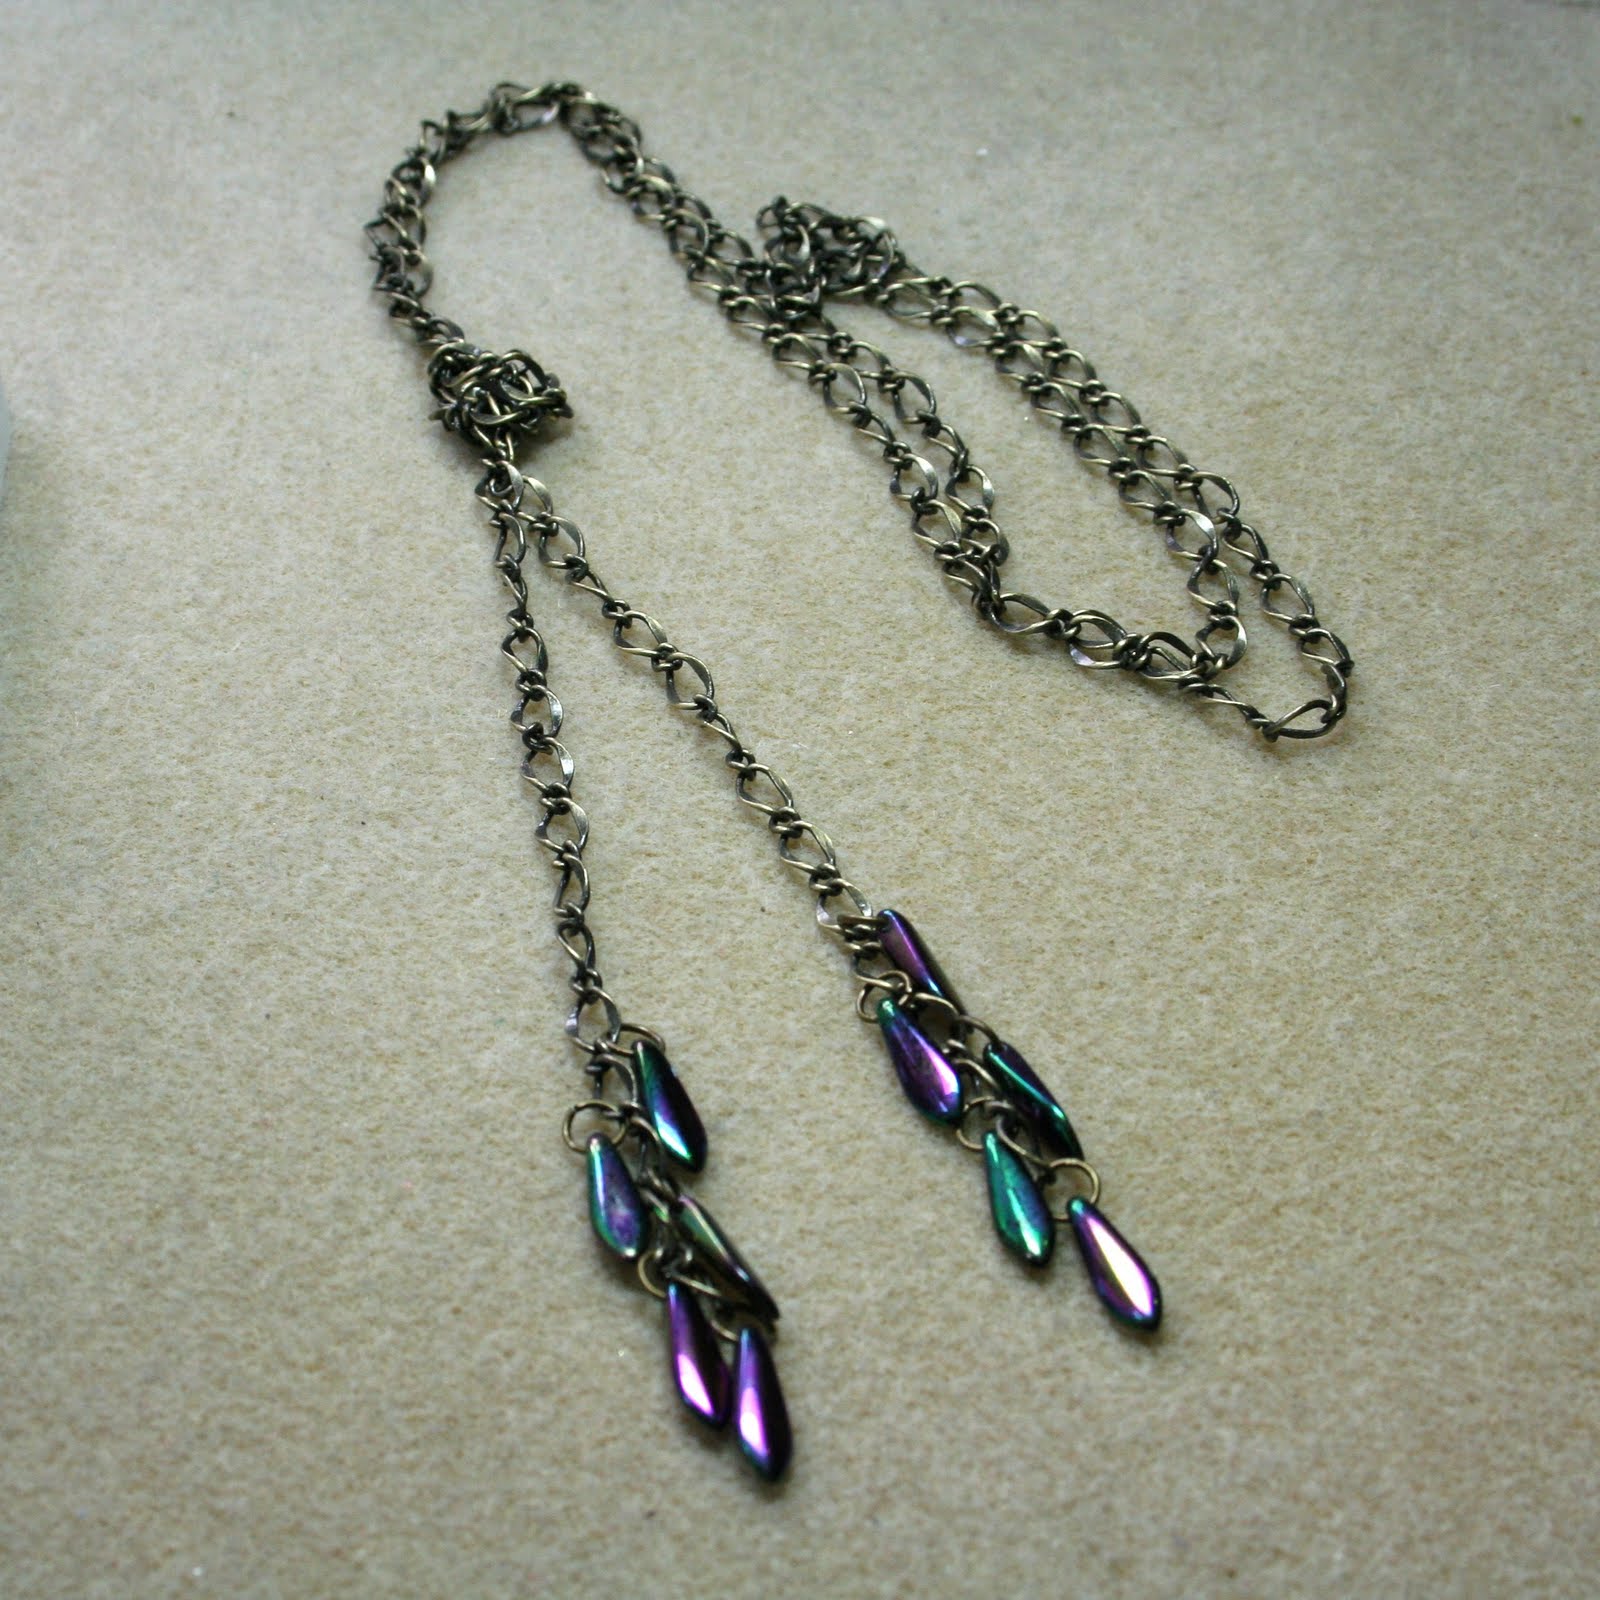
Free Tutorial - Something out of Nothing Lariat

Earlier this week Clair from Obstinate Pursuit posted some lovely cards made from little bits and pieces and it reminded me of how much I enjoy making something out of practically nothing. I rummaged through my bead stash and came up with a length of brass chain, some jump rings and 10 purple dagger beads, not a lot really. I had a play about and came up with this simple lariat.


You will need approximately 1 metre of decorative chain, 10 jump rings to match and 10 dagger beads.


Using 2 pairs of pliers open a jump ring sideways and add a dagger bead.


Attach to the bottom link of one side of the chain.


Repeat up the chain, alternating the sides that you attach the jump rings to.


Repeat for the other end of the chain, tie an overhand knot and you are done!


Don't forget to add a photo to our Flickr pool if you make this project (link up on the right).


Happy beading!


Sarahx

Saturday, 19 March 2011

Pearl Ladder Ring Tutorial

Quite often I have very small amounts of beads left over from larger projects and I am sure you do too. I hate to throw them away but it's also a nuisance to have almost empty bead tubes cluttering up your bead stash. If you are anything like me, you really don't have the extra space. So I came up with this little project which uses ladder stitch to turn those little bits and bobs into a ring that works up quickly and easily and would make a great last minute gift.


You will need a few gramms of size 11 seed beads, 6mm focal beads ( I used 3 x swarovski pearls) and fireline or wildfire.


1. Thread your needle with approx 1.5 metres of thread, pick up 6 size 11 beads and go back up the first 3 you add, snug up the last 3 beads you added next to them and go down through them.

2. Pick up 3 seed beads, go back though the last 3 beads added in step 1 and then back down through the 3 beads added in this step.

3. Repeat step 2 until your ladder strip is the required length for your finger.


4. Join the 2 ends of the strip by going up through the first 3 beads in your strip and back down the last 3 beads of the strip. Repeat this step to reinforce the join.


5. Weave in ends, tying several half hitch knots as you do so.
6. Repeat steps 1-5 for a second strip, but weave in only the shorter tail thread, leaving a long thread to add the centre beads.
7. With your needle & thread exiting a set of seed beads in strip 2, pick up 4 seed beads and go up through a set of 3 seed beads in strip 1 pulling fairly tight to join the strips together. *Go up through the next set of 3 seed beads, pick up 4 seed beads and go up through the next set of 3 seed beads in strip 2. Repeat from * one more time for a total of 3 sets of 4 seed beads. Exiting with your thread in the centre, pick up 1 size 6mm bead and go up through strip, repeat this pattern of 3 sets of 4 seed beads, 1 set of 6mm bead as required, ending with 3 sets of 4 seed beads. My ring is as follows 3 sets of seed beads, 1 set 6mm, 3 sets of seed beads, 1 set 6mm, 3 sets of seed beads, 1 set 6mm, 3 sets of seed beads.


8. Weave in tail, using several half hitch knots as you do so.
I hope you enjoy this quick little project, don't forget to add pics to the OTTBS Flickr group if you make one. We would love to see them!
Happy beading!
Sarahx

Saturday, 26 February 2011

Free Pattern - Triple Diamond Brick Stitch Earrings

You have probably already noticed that I quite like very long earrings. It's an inherited taste from my grandma who always wore what she called Gypsy Rose Lee style earrings. This weeks pattern is inspired by the colours in our February moodboard challenge but feel free to use whatever combinations you like. I'd love to see them if you make a pair! Happy beading!

Sarahx

Saturday, 19 February 2011

Free Pattern - Blue Waves Peyote Bracelet

This Valentines day the husbeast treated to me to a trip to Cardiff, which is always dangerous for my stash busting plans as the lovely bead shop Crystals and Ice is there. True to form I bought quite a lot of seed beads though I did restrain myself and stay away from the delica's! I bought some blue's, forgetting that I already had a plastic carton full of them)and wanted a simple pattern to use some of them up. I came up with this and thought that I would share it with our lovely OTTBS readers as I bet I'm not the only one with masses of seed beads in blue! I think it would look good in lots of other combinations too, I may try a black and red version at some point.

The dimensions using size 11 miyuki seed beads are width 1.31 inches, length 6.47 inches, just add or detract rows to resize. The bracelet uses the odd count peyote technique, if you aren't familiar with this or need a refresher, here is a link to a tutorial on about.com http://beadwork.about.com/od/beadingstitchtutorials/ss/Flat_odd_Count_Peyote.htm

Happy beading!

Sarahx

Saturday, 12 February 2011

Hey Cupcakes! Free brick stitch cupcake pattern.

I may not be a romantic but I do have a sweet tooth! Here is a sweet cupcake pattern to help you use up your seed bead/delica stash up. It would make a lovely brooch as a gift for a keen baker or cake eater! Happy beading!

Sarahx


Saturday, 5 February 2011

Valentine Heart Free Brick stitch Pattern.

With only 9 days to go to Valentines Day, I thought it would be a good time to share this brick stitch heart pattern that I designed a while ago. It would make a great pendant, brooch or you could bead a few and link them up into a necklace or a bracelet. I designed it using delica's but you could just as easily use size 11 japanese seed beads.

I hope you like it!
Sarahx

Sunday, 24 October 2010

Stocking Fillers from Stash, Pearl Dangle Earrings Tutorial

I think we have probably established the fact that I love long earrings and this week's Stocking Filler from Stash tutorial is no exception. I am also continuing my new obsession with using chain.


You will need:
1 pair of earwires
1 pair of headpins
2 length's of chain (mine are each 2.5 inches long)
2 10mm pearls

Tools: wire snips to cut the chain, flat nosed & round nosed Pliers.

1. using your flat nosed pliers, open the loop one an earwire.

2. Thread through the end of a piece of chain.

3. Close the loop.

4. Thread 1 pearl on a headpin and use your round nose pliers to create the 1st part of a wire wrapped loop.


5. Thread the bottom end of the chain through the loop and finish of your wire wrapped loop and trim the end with your wire snips.

6. Repeat for a second earring.
I have assumed a knowledge of basic jewellery making skills, if you are new to jewellery making you can find instructions here http://www.beadstylemag.com/How%20To/Basics.aspx
Happy Christmas Beading!
Sarahx

Saturday, 16 October 2010

Stocking Fillers from Stash. Chain Swing Earrings Tutorial.

This weeks Stocking Fillers from Stash Tutorial is for these incredibly simple but fun to wear chain swing earrings. I first made this design after I bought some lovely donut shaped ceramic flowers at the Chepstow Bead & Gem Fair last January, I got them home & realised that I had no idea how to use them! After trying all sorts of ridiculously complicated techniques I finally decided that simple is best, threaded them on some chain and added an earwire. Since then these quick and simple earrings have become a great emergency gift standby, so I thought I would share them as I think they will make great little stocking fillers for Christmas.
You will need,
2 x equal lengths of small linked chain (I used a length of 3 inches)
Note: Trace chain is probably too small, check that your earwire will go through the links before cutting.
2 x 15mm donut shaped beads (I used MOP shell's which I got from the lovely Nicole from Beadwright)
1 pair of earwires

Tools: Wire snips to cut the chain and flat nosed pliers.

First decide how long you want the chain to dangle, double that measurement and cut 2 equal length pieces.

Using your flat nosed pliers, open the earwire loop by twisting sideways.

Thread one end of the chain through the earwire loop.

Thread the chain through your donut bead, taking care not to pull the chain off the earwire.


Thread the other end up over the outside of the donut and onto the earwire loop (try not to twist the chain).
Using your flat nosed pliers, twist the loop back sideways to close.

Repeat for 2nd earring.
I have assumed a knowledge of basic jewellery making techniques, if you are new to jewellery making you can find instructions here http://www.beadstylemag.com/How%20To/Basics.aspx

Happy Christmas Beading!
Sarahx


Saturday, 9 October 2010

Stocking Fillers from Stash - Hoop Earrings Tutorial

I am almost afraid to mention the word, as every time I do in real life it evokes a sigh of dismay, but there is no denying that it is time to start thinking of Christmas! For those of us who craft, this often involves planning and making our own gifts, as well as the torture of Christmas shopping on the High Street. Every year I vow to do mine online from the comfort of my own home, but I never do.

As I have a bead stash to bust, I have been thinking about quick and easy gift ideas to make myself and to share with the readers of this blog in the hopes that all of our stashes will be a bit smaller by the 25th December. I have been wanting to write tutorials for some time and I thought now was a good time to start.

For my first tutorial I have chosen a simple pair of simple hoop earrings that I have made many times, I hope you like them!


You will need;
Beadalon stringing wire
1 pair of earwires
2 crimp beads
6mm fire polish beads (FP)
Size 11 seed beads (11)

Tools; Wire Cutters, Crimping Pliers, Round nose Pliers


1. First cut a piece of beading wire 7 inches long, thread on 1 FP and 1 11, repeat 8 times then thread 1 FP.


2. Thread 1 crimp bead onto one end of the wire, pass the opposite wire through the crimp bead to form a circle.

3. Pass both wires through the FP next to the crimp bead and pull tight.


4. Crimp the bead and trim the wire ends.

5. Attach an earwire.


Repeat steps 1-5 to create a second earring.
I have assumed a knowledge of basic techniques such as crimping, if you are just starting out you can find instructions here -> http://www.beadstylemag.com/en/How%20To/Basics.aspx
or alternatively you can contact me if you have any questions and I will be happy to help!
Well, there it is, my first ever tutorial! I hope you like it and find it easy to understand. As always any comments would be appreciated and if you do use the tutorial to make some stocking fillers for your friends, we would love to see pictures! You can add them to the OTTBS Flickr pool here http://www.flickr.com/groups/1455268@N20/
Happy Christmas Beading!
Sarah.