Friday, 1 April 2011

April Moodboard

Welcome to the April Moodboard! This month I've chosen one of my all-time favourite colours schemes - black, white and red. But to give you several options you can either use all three colours or use just two of your choosing...black & white, black & red or red & white. And as always there are plenty of shapes, patterns and textures to inspire you...

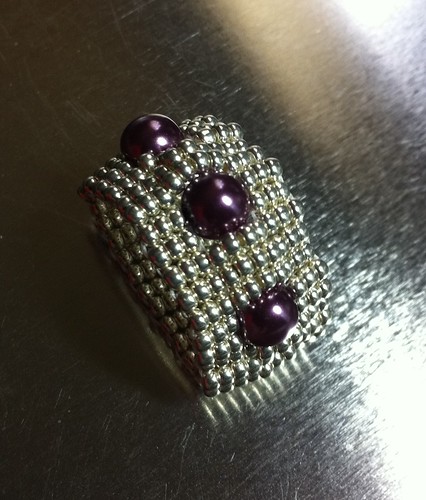
Clockwise from top-left: Peppermint Dream Ornament, I have a bag that's cool, Diamond Wall Pattern, Swap packages.

You can email your photographs to me at thecrimsonmoon7@gmail.com or alternatively you can add them to our Flickr group pool (link is on the sidebar).

The deadline for entries is April 30th and as usual a prize will be awarded to one of our lucky entrants chosen at random! Sarah is donating the prize this month and it's a kit to make her gorgeous Spring Blossom pendant...


We're looking forward to seeing what you all make!

Thursday, 31 March 2011

March Moodboard - And The Winner is...

Thanks to everyone who joined in with our moodboard this month, it was a really pretty colour scheme but a bit of a challenge I think. First of all lets have a recap of the mosaic I posted at the beginning of the month...

Spiral Maze, Macro of this Large White, T 53, Rhubarb and Custard.

And now for the eye candy...

Me


Sarah


Carol


Donna


Maria


Since Sarah and myself are excluded from the draw it was between three beaders this month. I asked my lovely assistant/Mum to pick a name from the hat and the winner is...


...Maria! Congratulations Maria, I'll be in touch with you about your prize shortly :) Thanks again to everyone who joined in and thanks also to everyone who takes the time to visit and follow our blog. Don't forget to check back tomorrow when I'll be posting a brand new moodboard for April!

Wednesday, 30 March 2011

Magazine Review - Bead Magazine Issue 29 (Apr/May)


This week I thought I would review the latest issue of Bead Magazine, this issue has 15 projects including polymer clay, stringing, seed bead work and wire work.


The 1st thing I do when I get a new beading magazine is make a beeline for the Fire Mountain Gems advert and the one in this issue is certainly inspirational! It is a stunning seed bead necklace by Oleksandra Sydorenko. Turning to the contents page, there are lots of colourful pictures of the projects which give a definite springtime feel! Of the projects my favourites are; Unfolding of the Implicate Order, which is a fabulous statement necklace featuring beaded beads (Please be aware though, that this article is on how to finish the necklace and does not include instructions for the beaded beads, these can be found in issue 28 or downloaded from http://www.hobbyworld.tv/) and the Fringed Cabochon Garden which is a lovely, earthy necklace with lots of leafy fringing.


Other features I like in this magazine are the Readers Challenge and Gallery, Bead Soup and the features on beaders. It's always nice to see what other people have been working on (one of the reasons why we all read blogs, I guess) and Bead Magazine does devote quite a lot of space to featuring the work of it's readers, which I really like about it.


As a devoted seed beader, I would prefer it if every single project in every single magazine was beadweaving! I do, however, think that Bead gives a good range of techniques and offers a good choice to all types of jewellery makers who would like to try something new. In particular, there is a wire ring in this issue which I think would be great for someone new to wire working. As I said earlier the main reason I like this magazine is the opportunity to see whats going on in the UK beady world but I also really like the format. The layout is good, it's easy to read and the colours are always eye-catching and bright.


Happy Beading!


Sarahx


Saturday, 26 March 2011

Free Pattern - Double Negative Brick Stitch Earrings.

Hey gang, hope you have all been enjoying the beautiful sunshine we have had this week! I'm not sure that this pattern is very seasonal but it is striking! I am a big fan of black and white, maybe with a touch of red and I hope you like this double negative brick stitch earring pattern.


Happy beading!
Sarahx

Wednesday, 23 March 2011

Carol's Pearl Ladder Ring

We have a new team member here at OTTBS! Welcome to Carol aka Bead Queen, we are glad you joined us!

Wednesday is supposed to be a review, but when I saw that Carol had made this gorgeous version of the Pearl Ladder Ring that I posted on Saturday, I just had to share this instead!

This is the first time we have had a finished project made from the OTTBS tutorials, so it is pretty exciting!

Happy Beading!

Sarahx

Monday, 21 March 2011

March Moodboard

Two gorgeous pieces to share with you today! First is a gorgeous cuff from Sarah...


And a beautiful bracelet from Carol...


If you'd like to join in with us please see this post for details.

Saturday, 19 March 2011

Pearl Ladder Ring Tutorial

Quite often I have very small amounts of beads left over from larger projects and I am sure you do too. I hate to throw them away but it's also a nuisance to have almost empty bead tubes cluttering up your bead stash. If you are anything like me, you really don't have the extra space. So I came up with this little project which uses ladder stitch to turn those little bits and bobs into a ring that works up quickly and easily and would make a great last minute gift.


You will need a few gramms of size 11 seed beads, 6mm focal beads ( I used 3 x swarovski pearls) and fireline or wildfire.


1. Thread your needle with approx 1.5 metres of thread, pick up 6 size 11 beads and go back up the first 3 you add, snug up the last 3 beads you added next to them and go down through them.

2. Pick up 3 seed beads, go back though the last 3 beads added in step 1 and then back down through the 3 beads added in this step.

3. Repeat step 2 until your ladder strip is the required length for your finger.


4. Join the 2 ends of the strip by going up through the first 3 beads in your strip and back down the last 3 beads of the strip. Repeat this step to reinforce the join.


5. Weave in ends, tying several half hitch knots as you do so.
6. Repeat steps 1-5 for a second strip, but weave in only the shorter tail thread, leaving a long thread to add the centre beads.
7. With your needle & thread exiting a set of seed beads in strip 2, pick up 4 seed beads and go up through a set of 3 seed beads in strip 1 pulling fairly tight to join the strips together. *Go up through the next set of 3 seed beads, pick up 4 seed beads and go up through the next set of 3 seed beads in strip 2. Repeat from * one more time for a total of 3 sets of 4 seed beads. Exiting with your thread in the centre, pick up 1 size 6mm bead and go up through strip, repeat this pattern of 3 sets of 4 seed beads, 1 set of 6mm bead as required, ending with 3 sets of 4 seed beads. My ring is as follows 3 sets of seed beads, 1 set 6mm, 3 sets of seed beads, 1 set 6mm, 3 sets of seed beads, 1 set 6mm, 3 sets of seed beads.


8. Weave in tail, using several half hitch knots as you do so.
I hope you enjoy this quick little project, don't forget to add pics to the OTTBS Flickr group if you make one. We would love to see them!
Happy beading!
Sarahx