Showing posts with label making. Show all posts

Saturday, 7 May 2011

Free Tutorial - Something out of Nothing Lariat

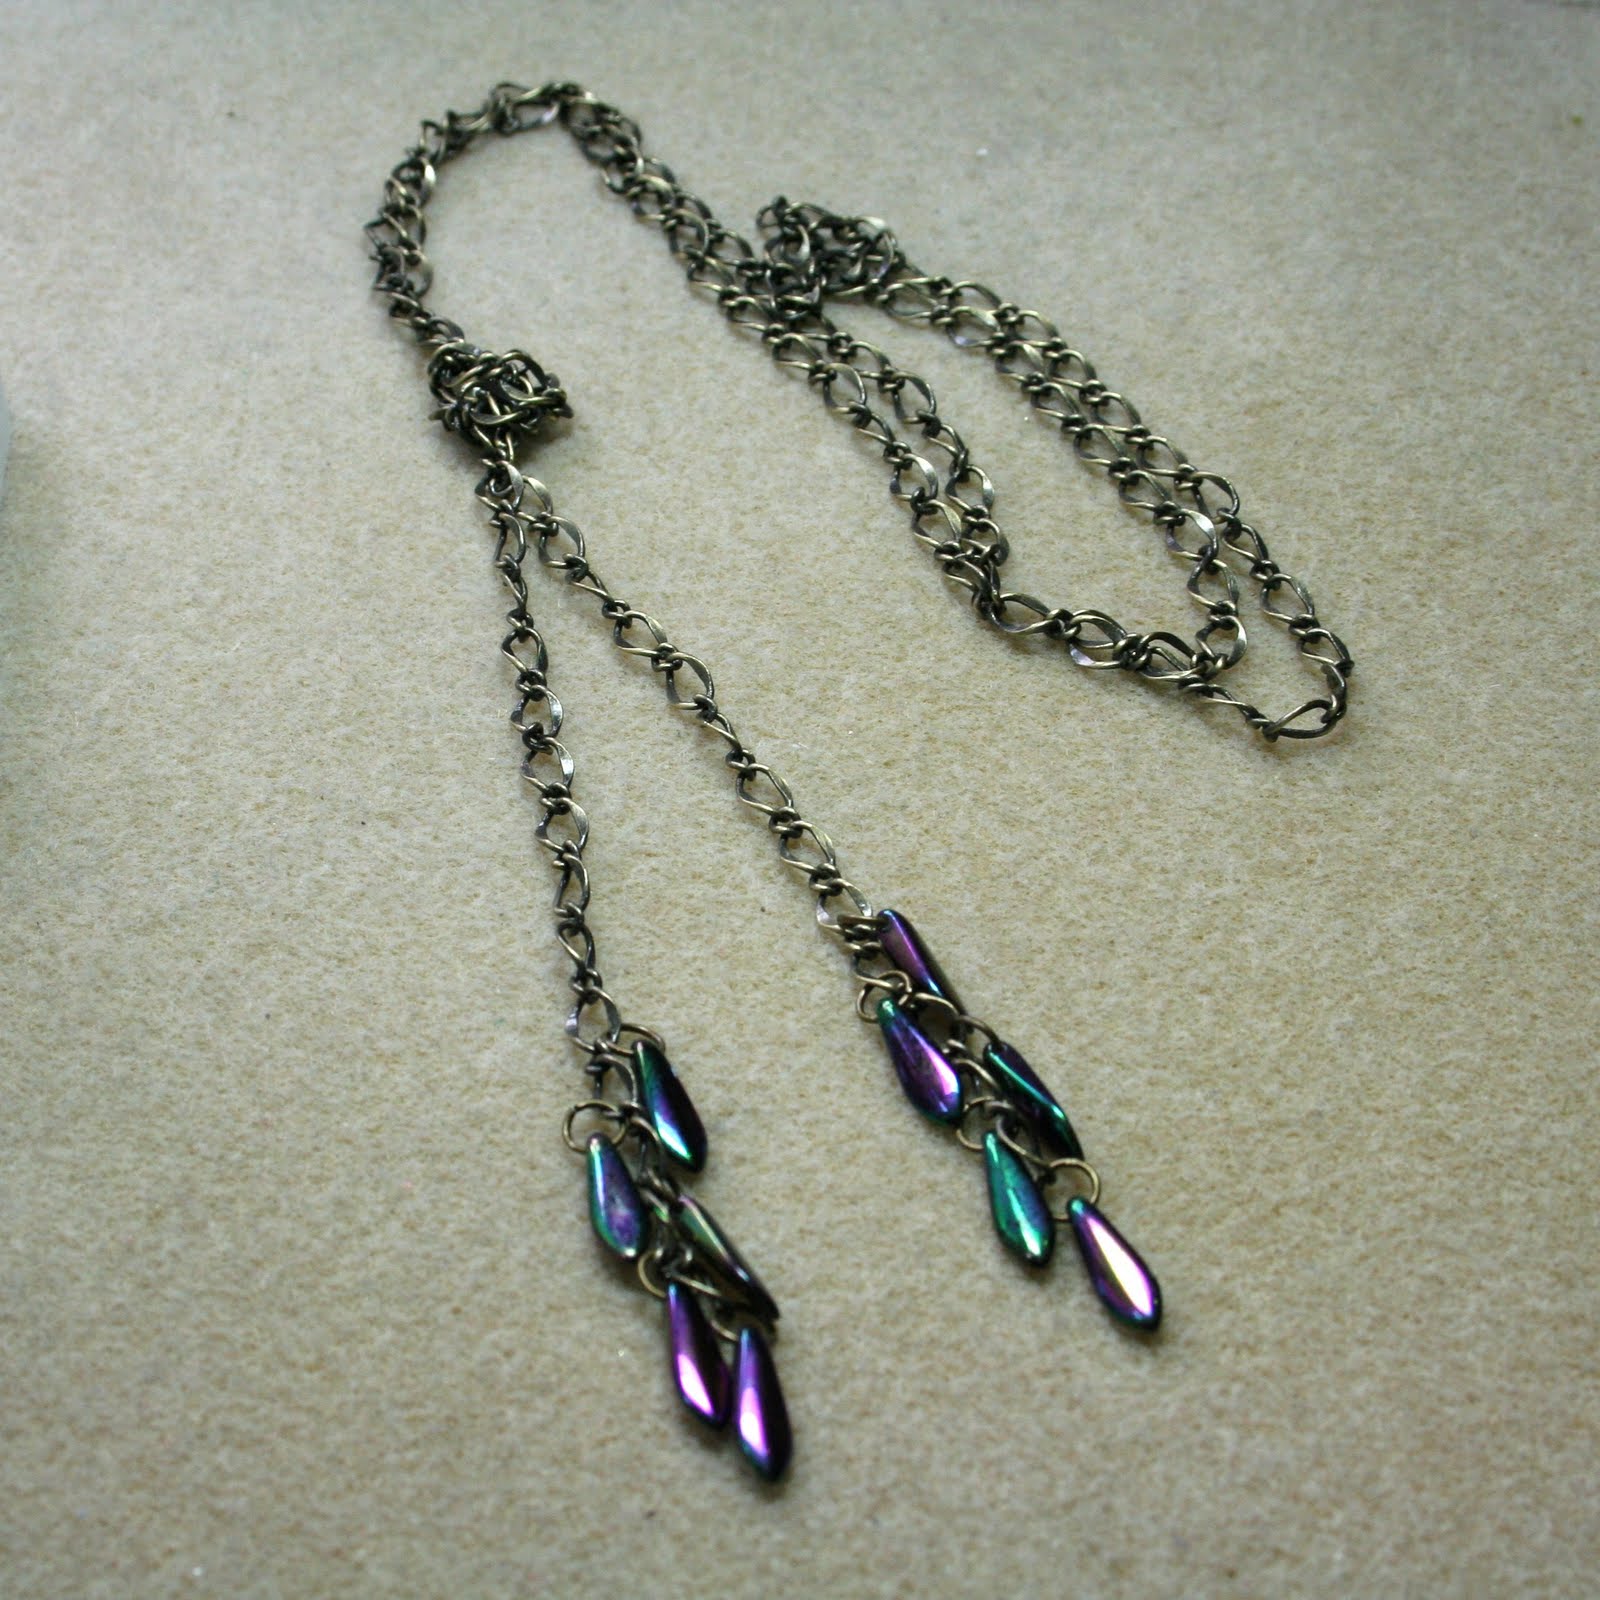
Earlier this week Clair from Obstinate Pursuit posted some lovely cards made from little bits and pieces and it reminded me of how much I enjoy making something out of practically nothing. I rummaged through my bead stash and came up with a length of brass chain, some jump rings and 10 purple dagger beads, not a lot really. I had a play about and came up with this simple lariat.


You will need approximately 1 metre of decorative chain, 10 jump rings to match and 10 dagger beads.


Using 2 pairs of pliers open a jump ring sideways and add a dagger bead.


Attach to the bottom link of one side of the chain.


Repeat up the chain, alternating the sides that you attach the jump rings to.


Repeat for the other end of the chain, tie an overhand knot and you are done!


Don't forget to add a photo to our Flickr pool if you make this project (link up on the right).


Happy beading!


Sarahx

Saturday, 16 April 2011

Reflections Bracelet Tutorial


This weeks tutorial is for this super simple but pretty Swarovski Ring and cord bracelet. I've had the ring for a couple of years and really wanted to bust it out of my stash as it's far too lovely to languish in a box unused.

Materials required: 1 x Swarovski Crystal Ring, 2 x 8 inches (or length to fit your wrist) 2mm wide faux suede cord, 4 x cords ends (to fit 2mm), 2 x open jump rings, 1 x toggle clasp. 1. Place one end of your cord inside the cord end and, using flat nose pliers, close the cord end over the cord.


2. Repeat until all ends of the cord have a connector.


3. Fold one length of cord in half and pass the folded end through the Swarovski ring.


4. Take the two cord ends and pass them between the ring and the folded end of the cord.


5. Pull snug and repeat steps 3- 5 on the other side.


6. Using round nosed pliers, open a jump ring and thread it through the holes in the cord ends on one side of the bracelet.


7. Thread the jump ring through one part of the toggle clasp and close. Repeat steps 6 & 7 on the other side.


Happy Beading!


Sarahx

Sunday, 24 October 2010

Stocking Fillers from Stash, Pearl Dangle Earrings Tutorial

I think we have probably established the fact that I love long earrings and this week's Stocking Filler from Stash tutorial is no exception. I am also continuing my new obsession with using chain.


You will need:
1 pair of earwires
1 pair of headpins
2 length's of chain (mine are each 2.5 inches long)
2 10mm pearls

Tools: wire snips to cut the chain, flat nosed & round nosed Pliers.

1. using your flat nosed pliers, open the loop one an earwire.

2. Thread through the end of a piece of chain.

3. Close the loop.

4. Thread 1 pearl on a headpin and use your round nose pliers to create the 1st part of a wire wrapped loop.


5. Thread the bottom end of the chain through the loop and finish of your wire wrapped loop and trim the end with your wire snips.

6. Repeat for a second earring.
I have assumed a knowledge of basic jewellery making skills, if you are new to jewellery making you can find instructions here http://www.beadstylemag.com/How%20To/Basics.aspx
Happy Christmas Beading!
Sarahx

Saturday, 16 October 2010

Stocking Fillers from Stash. Chain Swing Earrings Tutorial.

This weeks Stocking Fillers from Stash Tutorial is for these incredibly simple but fun to wear chain swing earrings. I first made this design after I bought some lovely donut shaped ceramic flowers at the Chepstow Bead & Gem Fair last January, I got them home & realised that I had no idea how to use them! After trying all sorts of ridiculously complicated techniques I finally decided that simple is best, threaded them on some chain and added an earwire. Since then these quick and simple earrings have become a great emergency gift standby, so I thought I would share them as I think they will make great little stocking fillers for Christmas.
You will need,
2 x equal lengths of small linked chain (I used a length of 3 inches)
Note: Trace chain is probably too small, check that your earwire will go through the links before cutting.
2 x 15mm donut shaped beads (I used MOP shell's which I got from the lovely Nicole from Beadwright)
1 pair of earwires

Tools: Wire snips to cut the chain and flat nosed pliers.

First decide how long you want the chain to dangle, double that measurement and cut 2 equal length pieces.

Using your flat nosed pliers, open the earwire loop by twisting sideways.

Thread one end of the chain through the earwire loop.

Thread the chain through your donut bead, taking care not to pull the chain off the earwire.


Thread the other end up over the outside of the donut and onto the earwire loop (try not to twist the chain).
Using your flat nosed pliers, twist the loop back sideways to close.

Repeat for 2nd earring.
I have assumed a knowledge of basic jewellery making techniques, if you are new to jewellery making you can find instructions here http://www.beadstylemag.com/How%20To/Basics.aspx

Happy Christmas Beading!
Sarahx